Website Terms of Use

All content and media on the CFPhysio website is created and published online for information purposes only. Before viewing the content on the this website you should read the website terms of use and privacy policy. The content in this website is not intended to be a substitute for professional medical advice and should not be relied upon as medical advice. If you have any concerns about your health, or concerns are raised from information on this website, please contact your treating doctor, qualified health professional or local clinic.

Click here to view website Terms of Use

I DO NOT AGREE

Skip to content
CF Physio — Learn. Empower. Thrive.

Inhalation Therapy

Equipment Setup

Below are examples of various inhalation therapy equipment and instructions for setting up the equipment. Please note the Innospire Go is no longer available on the market for purchase however some individuals may still be using these devices.

Eflow Rapid
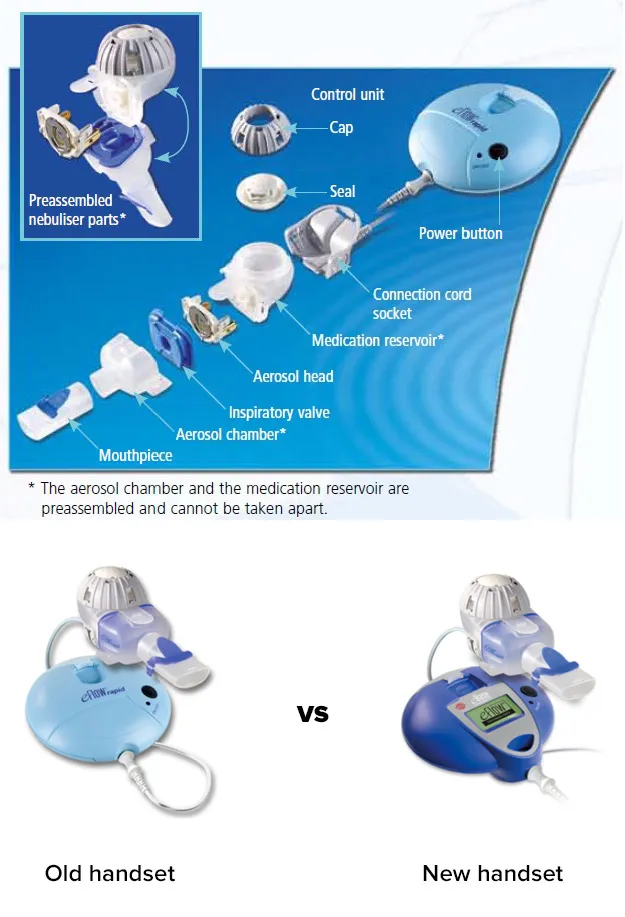
Exploded diagram of the eFlow Rapid labelling each part in order: control unit with power button and connection cord socket, cap, seal, aerosol head, medication reservoir, aerosol chamber, inspiratory valve and mouthpiece. A note states the aerosol chamber and medication reservoir are preassembled and cannot be taken apart. Below, the old light blue handset is shown beside the new dark blue handset with a digital display.

Pari LC Sprint/Sprint Star

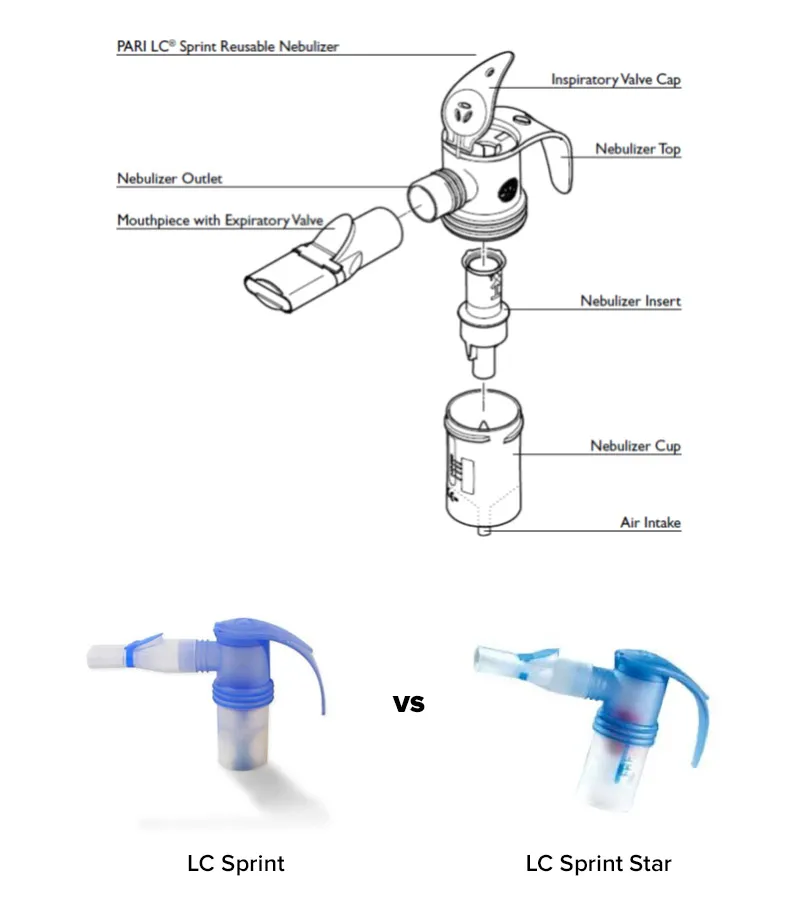
Exploded diagram of the PARI LC Sprint reusable nebuliser labelling the inspiratory valve cap, nebuliser top, nebuliser outlet, mouthpiece with expiratory valve, nebuliser insert, nebuliser cup and air intake. Below, the blue LC Sprint is shown beside the LC Sprint Star for comparison.

If combining with PEP therapy, please ensure the mouthpiece is changed to one without a flap (expiratory port).

Setting on Air wall outlet: 6-8L/Min

LC Plus
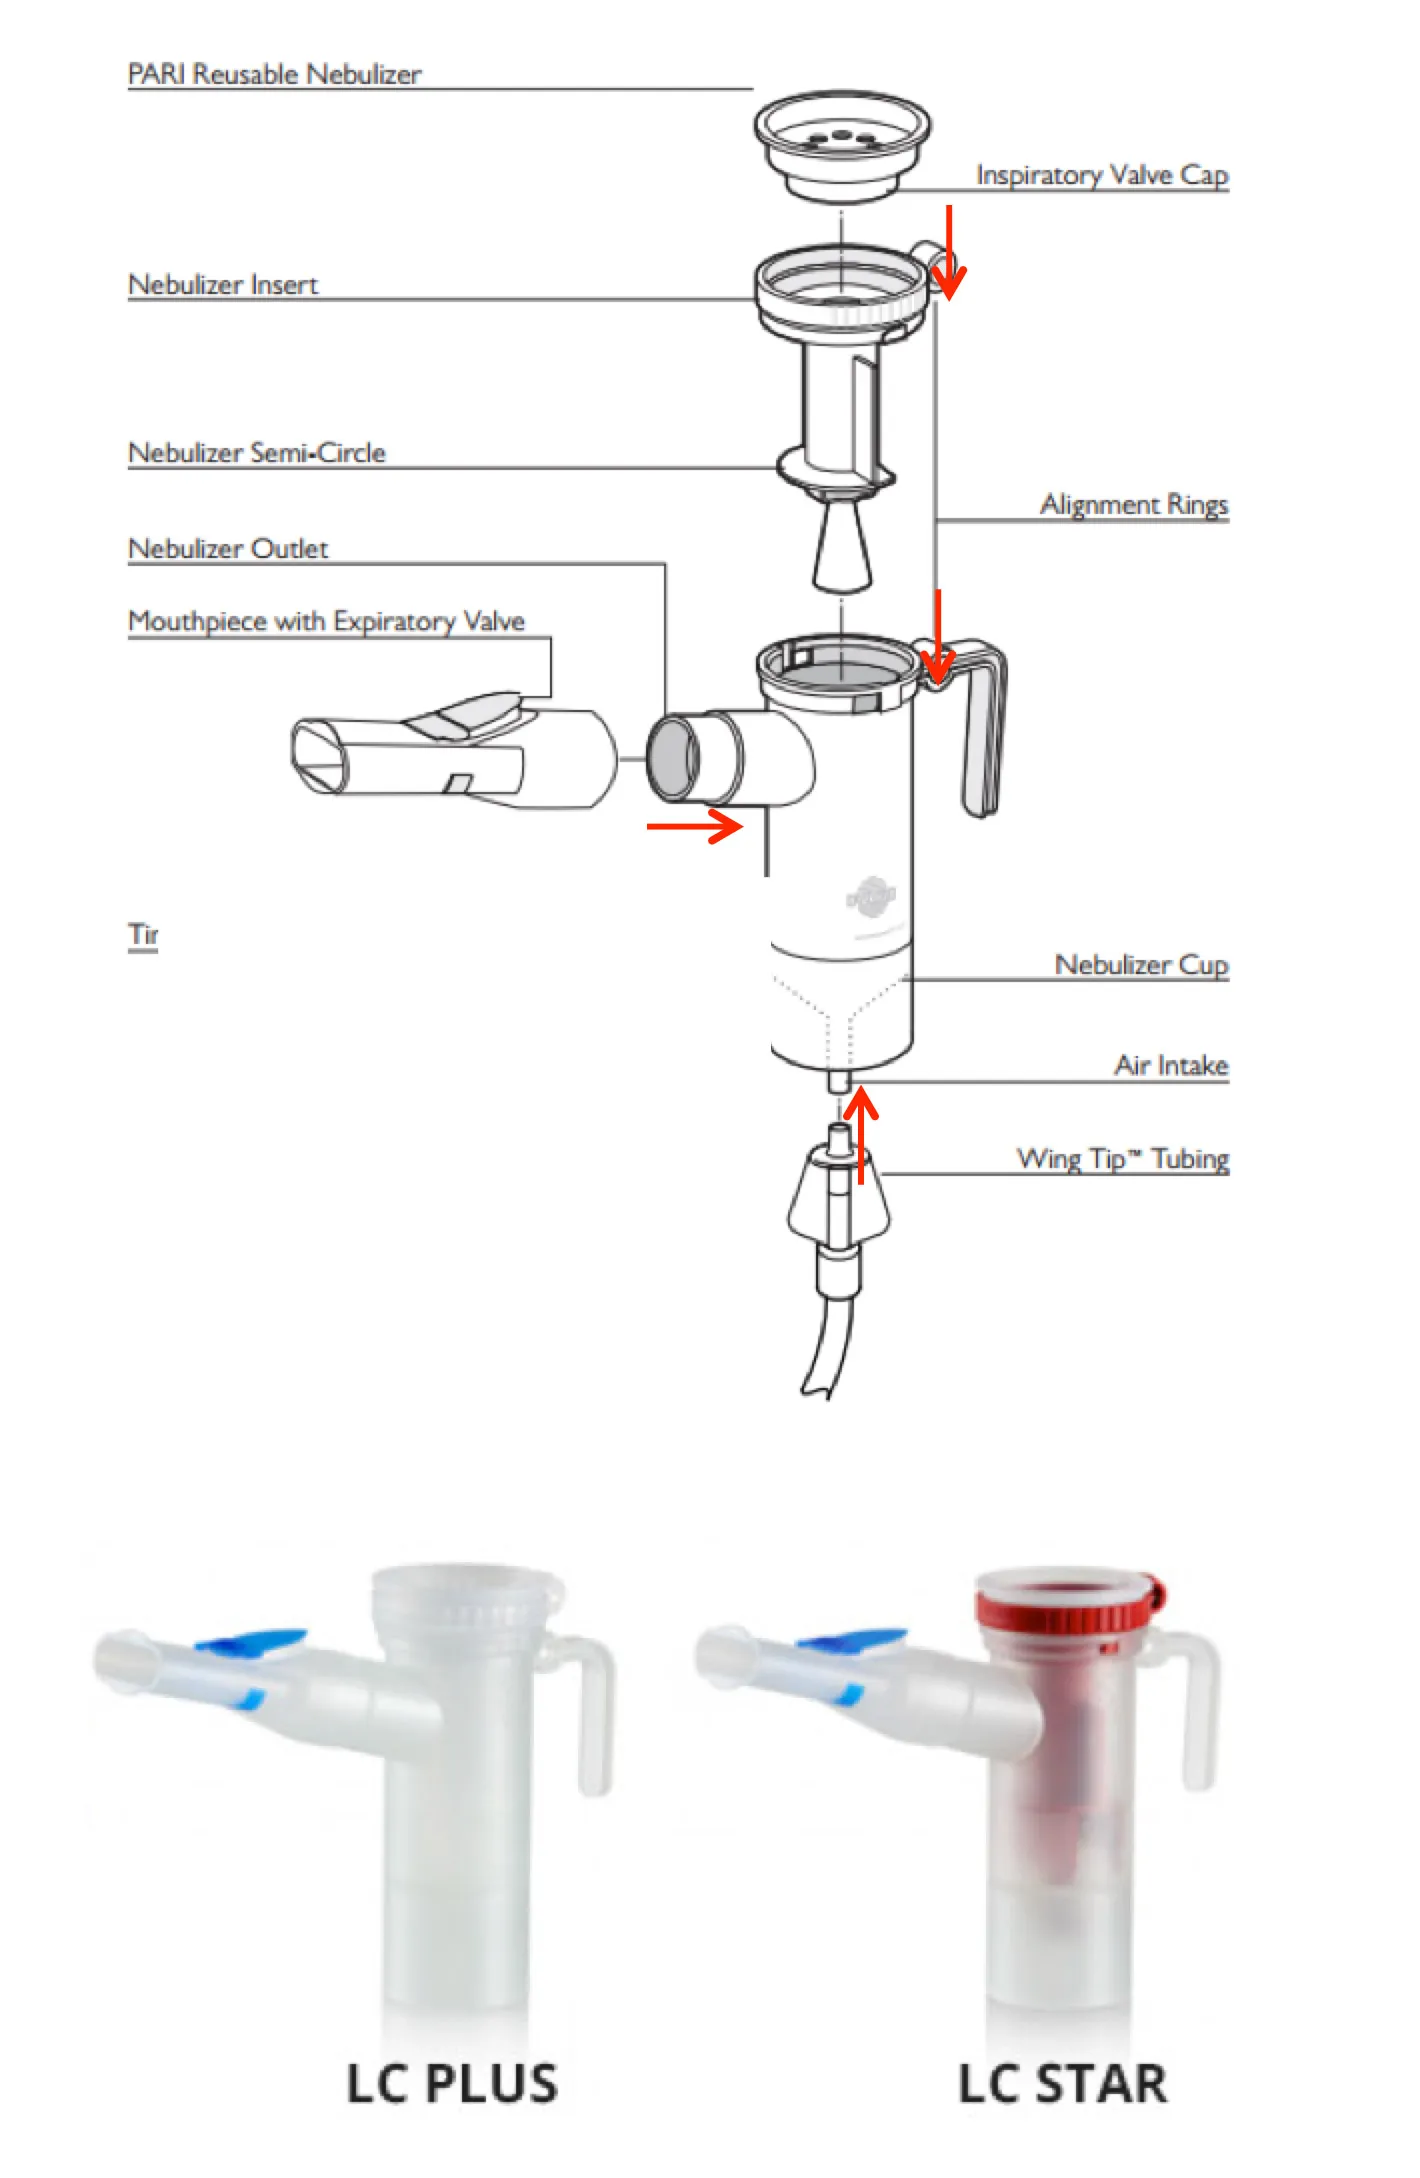
Exploded diagram of the PARI reusable nebuliser labelling the inspiratory valve cap, nebuliser insert, nebuliser semi-circle, alignment rings, nebuliser outlet, mouthpiece with expiratory valve, nebuliser cup, air intake and Wing Tip tubing, with red arrows showing how the parts push together. Below, the clear LC Plus is shown beside the red-topped LC Star for comparison.

Please note: the alignment rings must match up for the neb to fit well.

** Please note the LC Star has been discontinued but some may still be in use.

If combining with PEP therapy, please ensure the mouthpiece is changed to one without a flap (expiratory port).

Setting on Air wall outlet: 6-8L/Min

SideStream Nebuliser
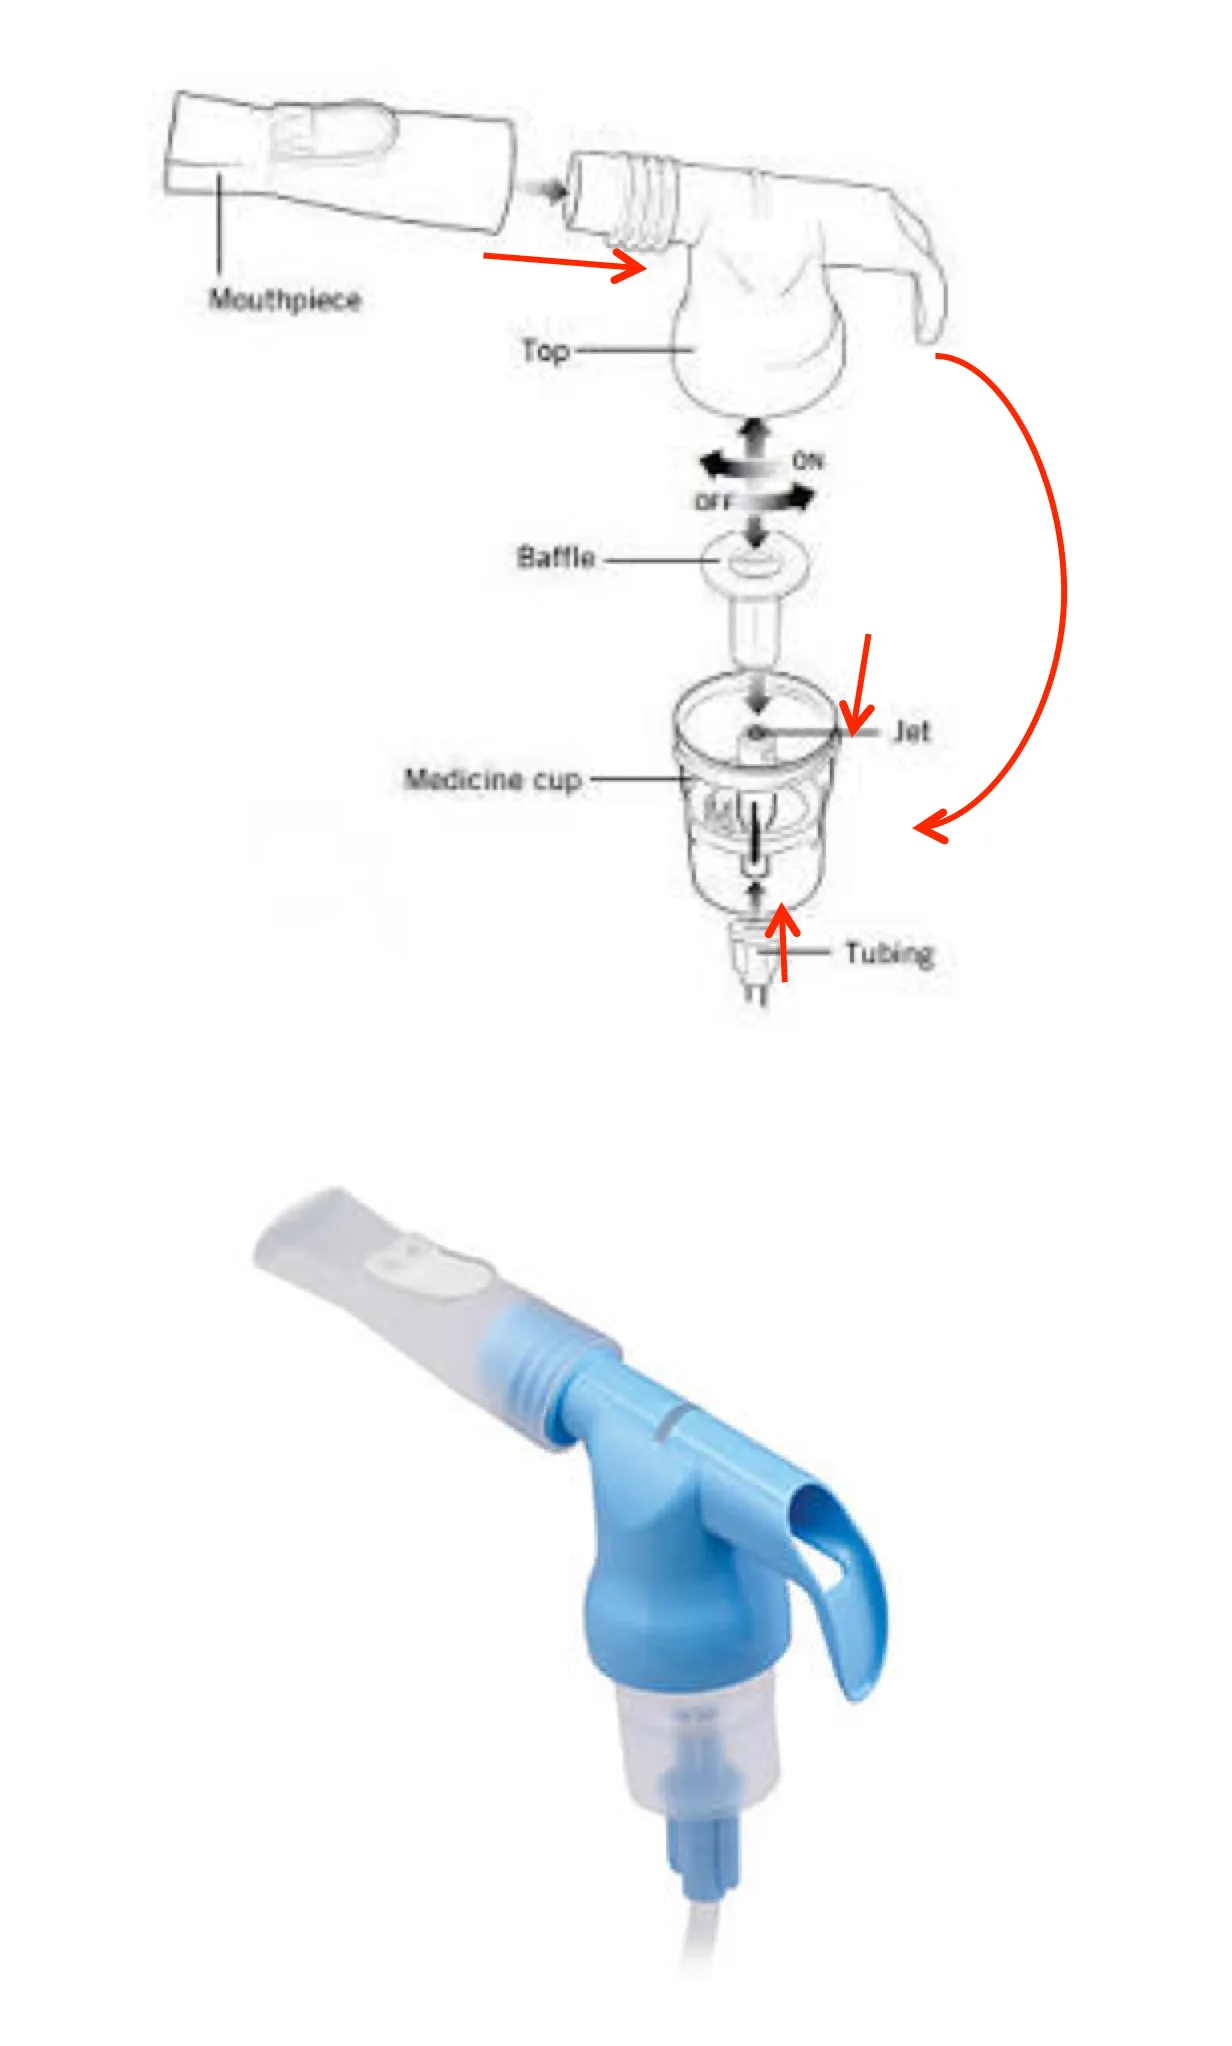
Exploded diagram of the SideStream nebuliser labelling the mouthpiece, top, baffle, jet, medicine cup and tubing, with arrows showing the order of assembly and the top turning on and off. Below, a photograph of the assembled blue and clear SideStream nebuliser with tubing attached.

Setting on Air wall outlet: 6-8L/Min

Aeroeclipse® Nebuliser
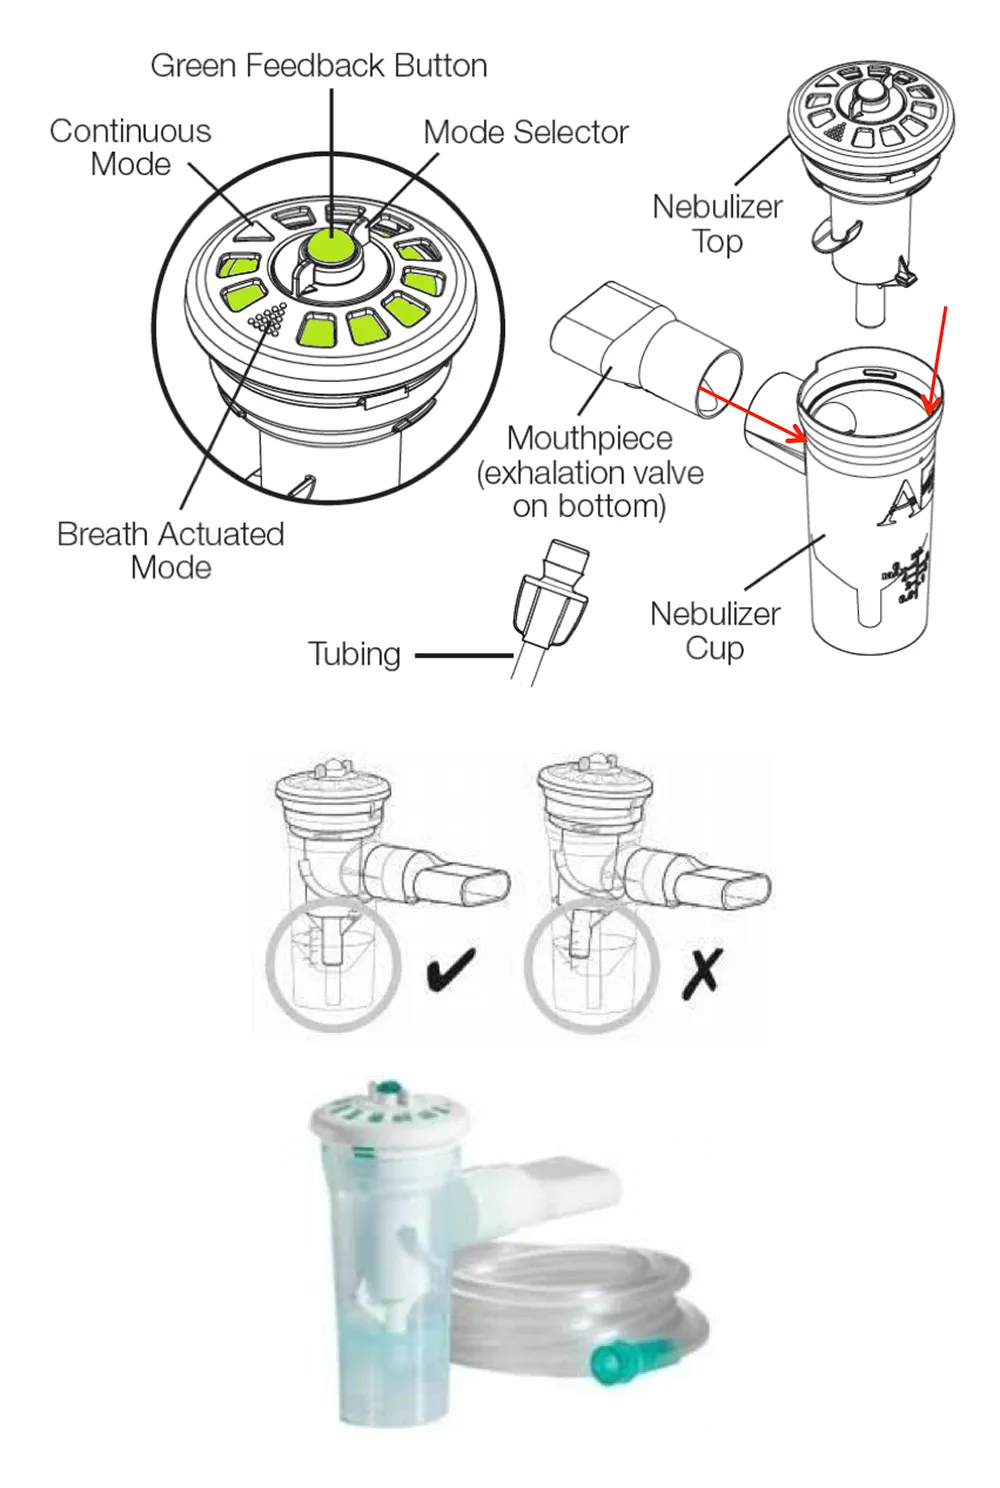
Diagram of the AeroEclipse nebuliser. A close-up of the top labels the green feedback button, the mode selector, continuous mode and breath actuated mode. The rest labels the nebuliser top, mouthpiece with exhalation valve on the bottom, nebuliser cup and tubing. Below, two small drawings marked with a tick and a cross show the correct and incorrect way the cup should sit, and a photograph shows the assembled device with its tubing.

Setting on Air wall outlet: 6-8L/Min

Pari LC Sprint/Plus with Filter Set

How to Assemble to LC Plus / LC Plus

  1. Place a filter pad (2) in the exhalation filter upper part (1b).
  2. Insert exhalation filter lower part (1a) in the exhalation filter upper part with the snap locks in the holes provided.
  3. Close the exhalation filter by turning its lower part clockwise as far as it will go.
  4. Insert the Y-connection (3) in the exhalation filter and on the nebuliser (5a).
  5. Insert the mouthpiece without the expiratory valve (4).
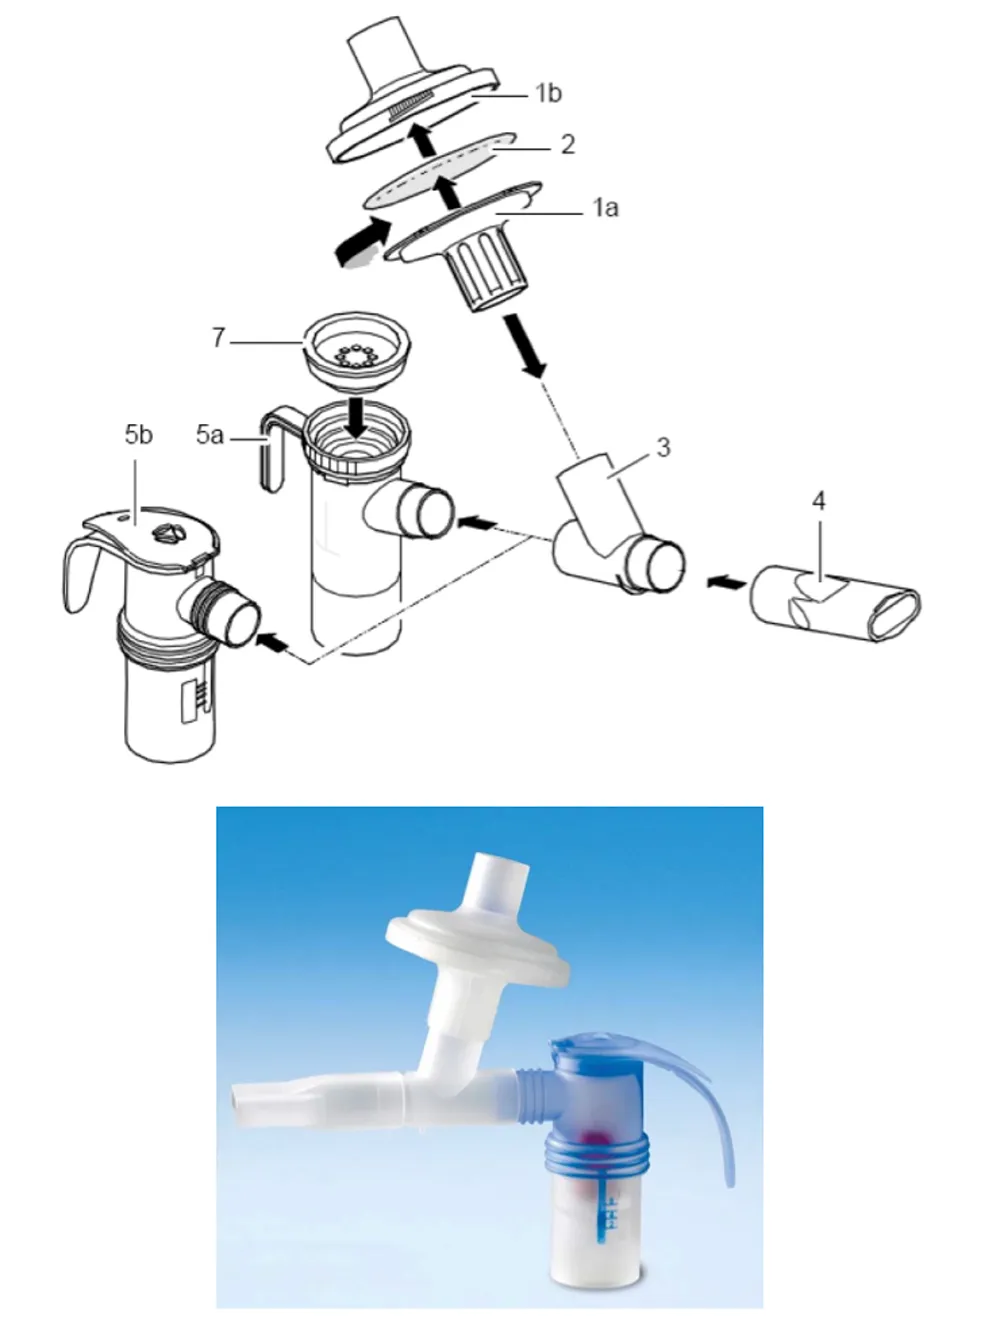
Exploded diagram of the LC Sprint or LC Plus with filter set, its parts numbered to match the assembly steps: the exhalation filter upper part (1b), filter pad (2), exhalation filter lower part (1a), Y-connection (3), mouthpiece without expiratory valve (4), the nebuliser (5a and 5b) and the nebuliser insert (7). Below, a photograph of the completed assembly with the filter, Y-connection and blue nebuliser chamber joined together.

Setting on Air wall outlet: 6-8L/Min

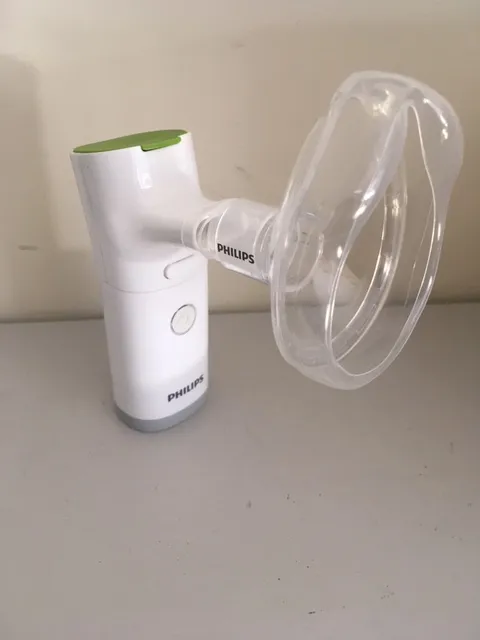
InnoSpire Go
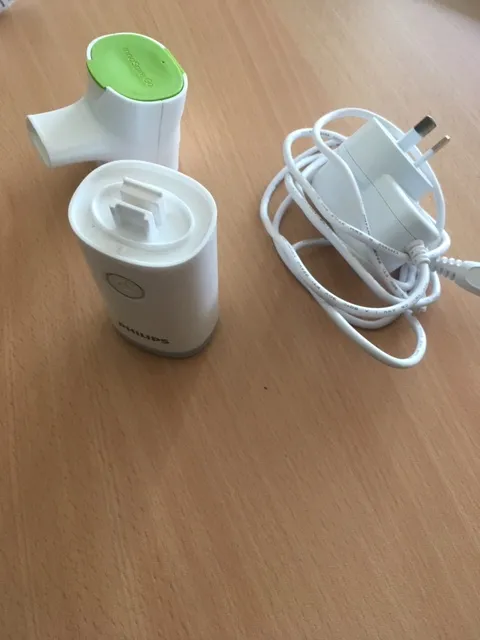
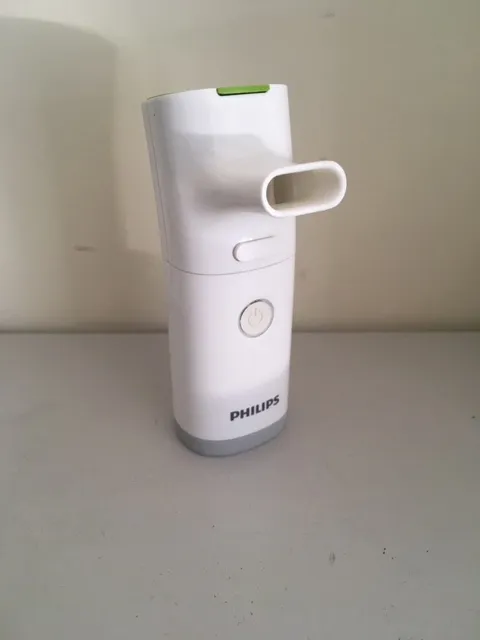
  1. The InnoSpire Go parts on a table: the white handset base with the power button, the separate mouthpiece top with its green lid, and the coiled mains charging cable.
  2. The assembled InnoSpire Go standing upright, with the mouthpiece attached at the top and the green medication lid closed.
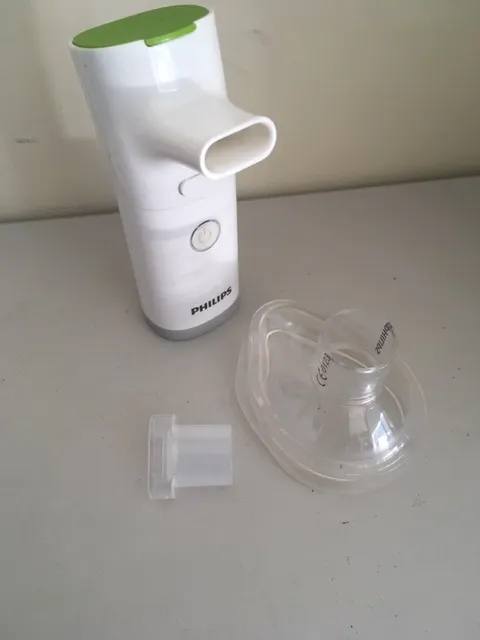
  3. The assembled InnoSpire Go beside its two alternative attachments: a short clear mouthpiece adapter and a clear face mask.
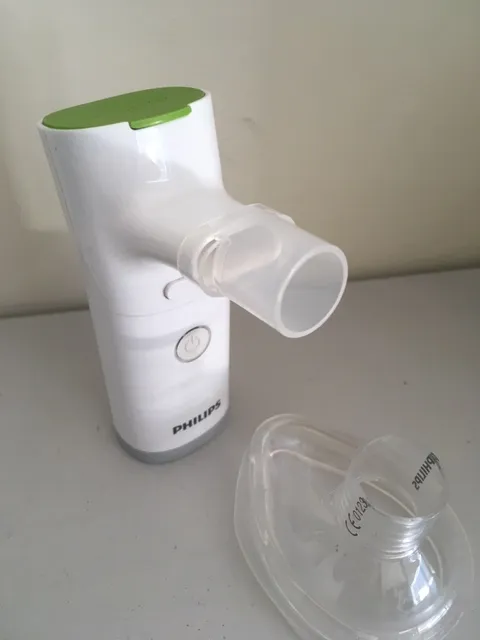
  4. The InnoSpire Go with the clear mouthpiece adapter fitted onto the handset, the face mask resting beside it.
  5. The InnoSpire Go with the clear face mask fitted onto the adapter, ready for use with a young child.
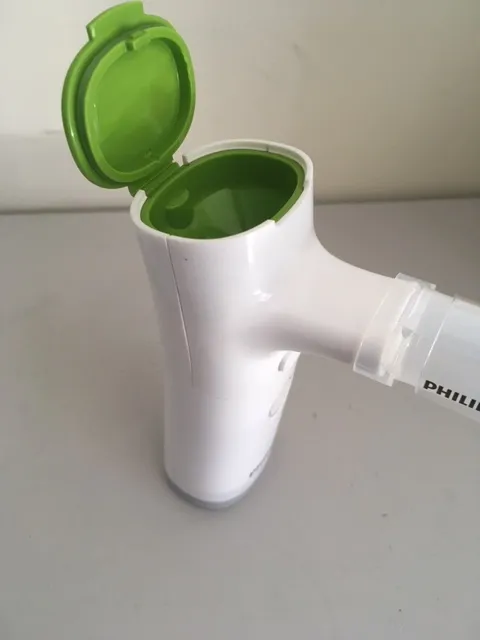
  6. Close-up of the InnoSpire Go with the green lid flipped open, showing the empty medication chamber where the dose is poured in.

E Chamber Nebuliser

Videos provided by Bird Healthcare (Trusted Healthcare Solutions | Bird Healthcare Australia)

Note: CFPhysio.com Inc encourages use of warm soapy water to wash nebuliser equipment after each use, please always follow product instructions and talk to your healthcare provider for recommendations.